| Info |
|---|
Starting with version 9.4, CxSAST lets users choose how to handle multiple full and public scans of the same project being queued. For additional information, refer to the instructions on Advanced Actions |

To create a CxSAST project, do the following:
1. Select Project & Scans > Create New Project.
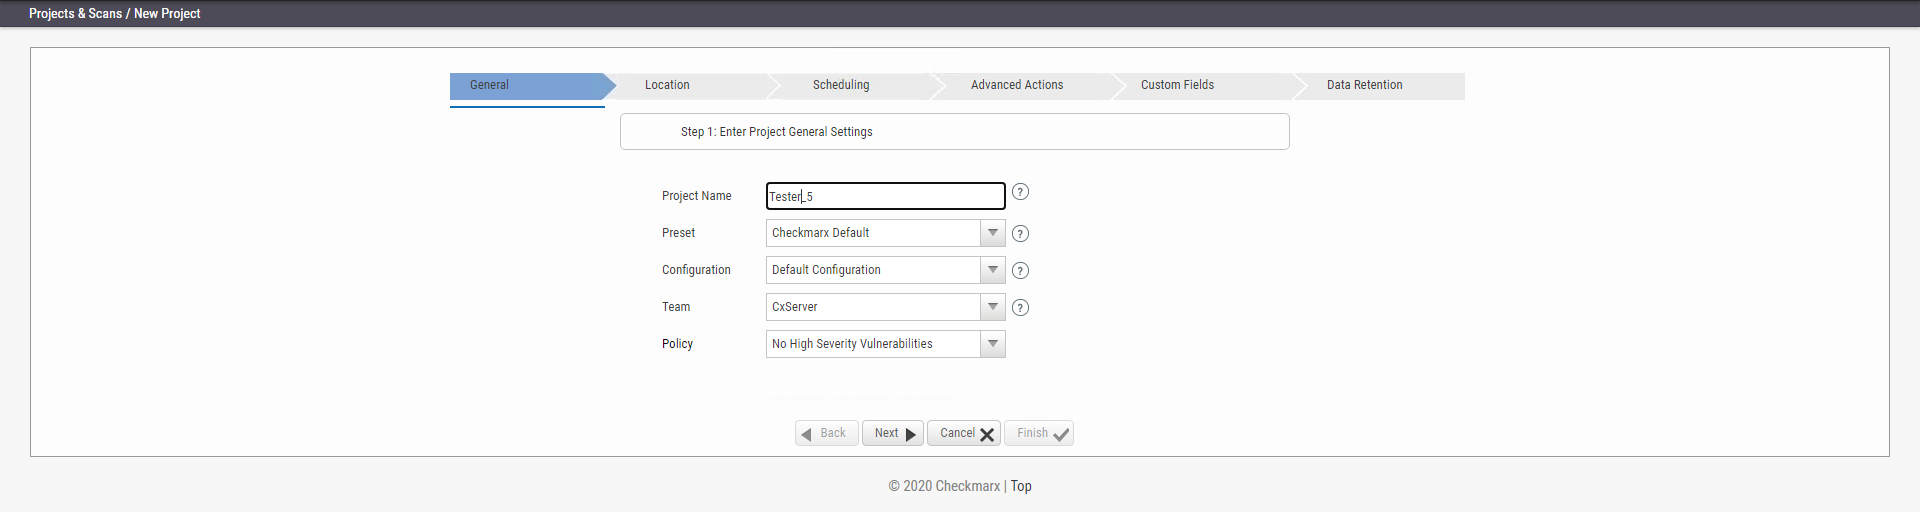
2. Configure the following General project properties:
- Project Name - should indicate the source code to be scanned and tracked.
| Info |
|---|
Project names cannot include the following characters: : ? ! \ / * " < > | ; & # $ ^ |
- Preset - set of queries to be run on the code scan. Default includes a set of queries recommended by Checkmarx for most projects. Select the preset that best matches your application, for example, for an Android project select Android. For a full list of executed queries, see the Vulnerability Queries section in the release notes.
- Configuration - apart from the default configuration setting, additional configuration selection traditionally for advanced users, can be used for scanning double-byte encoded source code. There is also the possibility to select a multi-language configuration. This means that all files will be scanned, regardless of language type. If there is a need, a threshold parameter can be adjusted in the database.
- Improved Scan Flow will only calculate the flow for the queries that were specified, significantly reducing the flow calculations duration and memory consumption.
- Default configuration will scan the primary language (e.g., java, C#, python, etc.) with the most files and all secondary languages (e.g., JavaScript, PL-SQL, vb-script, etc.). For example, a project with 100 java files, 50 python files, and 60 JavaScript files, will have only the java and JavaScript scanned with the Default configuration.
- The Multi-language configuration will scan all languages including multiple primary languages. If the same project with 100 java files, 50 python files, and 60 JavaScript files is scanned, all languages – java, python, and JavaScript will be scanned.
- Improved Scan Flow will only calculate the flow for the queries that were specified, significantly reducing the flow calculations duration and memory consumption.
- Team - determines who will be able to view your project and its scan results. Available options depend on the permissions of the logged-on user. Selecting CxServer allows access only to the server Administrator. If you're working as a single user, leave the default option.
- Policy (optional) - select a predefined violation policy from the Policy drop-down (e.g. No High Severity Vulnerabilities). Refer to Policy Management for more information about defining violation policies and rules.
3. Click <Next>. You are asked for the location of the source code.
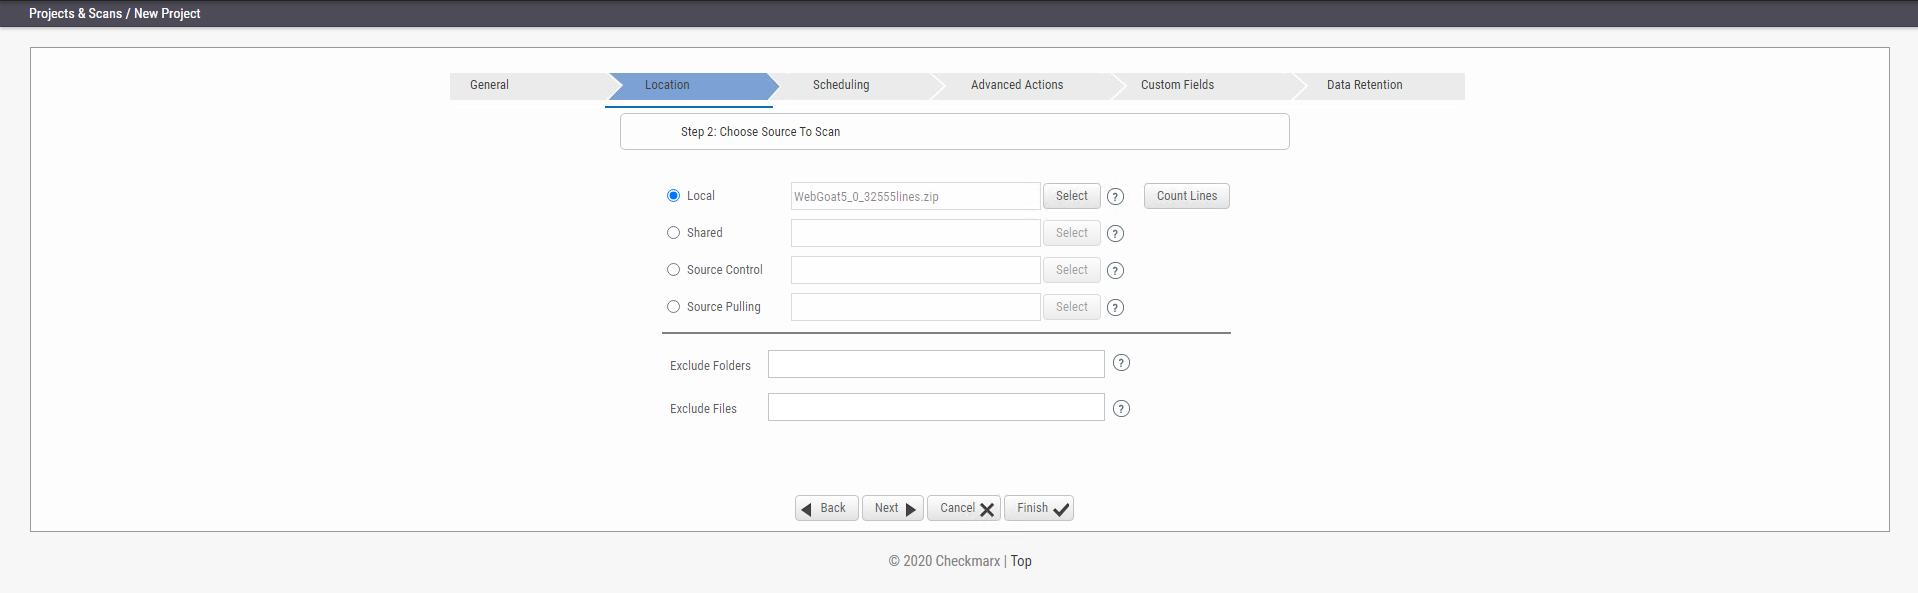
4. Configure the following source code Location properties:
Local - Click <Select> to browse to a local file that contains the code. Future scans to the project are also performed via local upload (see Managing Projects and Running Scans).
Info CxSAST does not scan two files with the same name or files with special characters that are not supported in Windows.
Info - If the file is larger than set for the MaxFileSize key in the web.config file, you are not able to upload it. By default, the MaxFileSize key is set to 200MB.
- The supported max. file size of zipped files is 1GB and the max size of uncompressed files is 2GB. Larger files cannot be uploaded, even if the MaxFileSize key is set accordingly.
Expand title To modify the MaxFileSize key in web.config 1. Open the web.config file in the installation folder of the Web Portal installation, which is located at <Installation folder>\Checkmarx\CheckmarxWebPortal\Web, usually C:\Program Files\Checkmarx\CheckmarxWebPortal\Web
2. Navigate to the MaxFileSize key.

3. Set the MaxFileSize key to the desired max. file size in MB (max. 2000 for uncompressed files) and then click
 to save the web.config file.
- To create a smaller zip file that only includes files with specified extensions, use the CxZip utility.
- Zip files generated in a Linux environment may not respond properly.
Info If a zip file is uploaded that contains a file path longer than 255 characters, the file is not sent for scanning. Shorten the file path and try again.
Info If the zip file contains another zip file inside, the internal zip file is not sent for scanning. Extract the content to the main zip file before scanning.
Shared - project code that is maintained on a network server accessible from the CxSAST Server. Click <Select>, provide your Windows domain credentials in order for CxSAST to access the network (username format: domain_name\user name), and select one or more network folders containing the project code.
Info Zipped source code is not supported for shared location scans. Extract the content of the zip file before scanning.
Info CxSAST does not scan two files with the same name or files with special characters that are not supported in Windows.
Source Control - project code that is maintained in either TFS , SVN , GIT or PerForce source control systems. Click <Select> (see Configuring the Connection to a Source Control System).
Info In cases where the project's source control location is defined as Git, the Git branch name is included under the Source Control field. Info Files inside a zip file that are located inside a repository are not sent for scanning. Extract the content of the zip file to the repository before scanning.
Info CxSAST does not scan two files with the same name or files with special characters that are not supported in Windows.
- Source Pulling - an extension to "Shared" option above, "Source Pulling" activates a configurable script to pull source code from a source control system into the Shared location specified. Note: this script must be set previously configured in the CxSAST Windows client application.
- For any issues, please review: Network and Shared dialogs may not work on "Localhost"
Optionally, you can exclude certain folders or files from the scan process.
Info Type a comma-separated list of the folders or files that you would like excluded from the scan; wildcards can also be used. In the below archive, the folder name ‘lib’ and the file name ‘readme.txt’ have been added to the Exclude fields and will not be included for the upcoming project scan:
|+ add-ons
| |+ connectors
| | |+ cvc3.js
| | |+ spass.js
| | + z3.js
| | - lib
| | | - readme.txt
| | | - smt_solver.js
| + src
| +doc
| - readme.txt
+ src
- lib
|- find_sql_injections.js
|- jquery.js
+ logic.jsInfo CxSAST does not scan two files with the same name or files with special characters that are not supported in Windows.
5. Click <Count Lines> to display the number of lines in the current project.
| Info |
|---|
The Java Script is enhanced during the scan process. The real count of lines might therefore be larger than the result displayed by running Count Lines or the Cx CMD Line Counter. |
6. Click <Next>. The following steps of the wizard are optional. You can click <Finish> to skip them.

| Info |
|---|
Scheduling is not applicable to a Local source code location, since the CxSAST Server cannot automatically access the local source. You will need to periodically manually upload a new zip file. |
7. Configure the following scan execution Scheduling properties:
- None - no schedule, you have to manually run the scan.
- Now - defines an immediate scan.
- By Schedule - define an automatic weekly scan according to the specified time.
- Run on Weekdays - define on which day to run the periodic scan.
- Run Time - define at what time to run the periodic scan.
| Info |
|---|
To support continuous integration development methodology, it is recommended to schedule periodic scanning of source files, so they can be checked after modifications. This can be automated via the CLI in the Build file, but it does not have to be done this way because CxSAST scans source code and does not require building or compiling the source code. |
| Info |
|---|
The next steps of the wizard are optional. To skip them all or some of them, click <Finish> after the last step you wish to configure. |
8. Click <Next> to configure additional advanced options.

9. Configure the following Advanced Action properties:
- Send pre-scan email to - define to which email address to send a pre-scan notification.
- Send post-scan email to - define to which email address to send a post-scan notification.
- Send scan failure email to - define to which email address to send a scan failure notification.
- Run post scan action - define which post scan action to run (see Configuring an Executable Action).
- Issue Tracking Settings - define to which issue tracking system to integrate (see Configuring JIRA Integration Settings).
- Parallel Scan Cancellation Mode - define what to do when you queue additional scans of the same project while the previous ones are still in the queue.
- KeepAll - process all the scans.
- KeepOld - process the first scan you started and cancel the newer ones.
- KeepNew - process the newest scan and cancel the previous ones.
- To apply the selected option to the same code only, select
 Identical Code Only.
 - To apply the selected option to scans already in process, select Include Scans in Process
| Info |
|---|
The Parallel Scan Cancellation Mode functionality only affects full and public scans. |
10. Click <Next> to define custom fields.

11. Configure the Custom Field properties according to the available custom fields (see Custom Field Management).
12. Click <Next> to configure data retention.

13. Configure the Data Retention properties:
- Number of latest scans to keep - Define the number of latest scans to be kept (see Data Retention Management).
14. Click <Finish> and check the scan status (see The Queue (v8.9.0 to v9.3.0)).
...
| Section | ||||||||
|---|---|---|---|---|---|---|---|---|
|