Using the Access Control Data Migration Tool (v9.0.0 and v9.2.0)
Phase 1 – Running the Access Control Data Migration Tool Installer
- This procedure is only for upgrading to CxSAST v9.0.0 or v9.2.0 from v8.8.0 or v8.9.0. If you wish to upgrade from a CxSAST version prior to v8.8.0, you must first upgrade to v8.8.0 or v8.9.0, and then perform the following procedure for upgrading to CxSAST v9.0.0 or v9.2.0.
- For a clean CxSAST installation (first-time CxSAST installation of v9.0.0 or later), do not run the Access Control Migration installer, only run the CxSAST installer. For further information and instructions, refer to the instructions for the desired version under Installing CxSAST.
- After starting the Access Control Data Migration Tool Installer, stop working with CxSAST, as any new data will not be migrated to the new CxSAST version.
- Running the Access Control Migration installer only takes a matter of minutes (up to approximately a half hour), depending on the size of the database being migrated.
- The Access Control Migration Tool should only be used once, even high-availability environments with multiple Manager servers.
- Request the download link for the new release of CxSAST (v9.0.0 and up) from here. You will get two executable files:
- Access Control Migration installer – for installing the new Access Control and performing data migration
- CxSAST upgrade installer – for upgrading to CxSAST (v9.0.0 and up)
- Cx Windows services and Web servers (depending on the Checkmarx components installed on the server) should not be stopped, as recommended for the upgrade.
1. First, run the Access Control Migration installer as an administrator.

2. Click <NEXT>. The Prerequisites Check window is displayed, showing the status of all prerequisite components for Access Control.

3. For any prerequisite that shows as not yet installed, click the respective <INFO> button for additional installation information, and then click Prerequisites Folder to install the missing component(s).
4. Click <Recheck Prerequisites> to confirm the installation status.
5. When all prerequisite components are installed, click <NEXT> to continue. The Access Control SQL Server Configuration window is displayed.

6. Define a connection to the installed SQL Server or to any other SQL server on your network, by selecting one of the following:
- Connect using Integrated Windows Authentication (login not required)
- Connect using SQL Server Authentication (provide SQL user name and password for login with SA permissions).
7. Click <Test Connection>. A "Connection Successful" message is displayed upon confirmed connection to the SQL Server.
- Host, port and login credentials are correct
- The machine is a member of a Windows domain (if not, either join the machine to a domain and perform a restart, or connect using SQL Server Authentication)
- The SQL Server Browser Windows service is running (if not, enable and start it).
- The migration tool installs and configures the Application Pool (CxAccessControl) to run with Windows Network Service, even if the previous CxSAST version had a different service account configuration. After installing Access Control, if the migration tool fails to run due to an SQL connection failure, navigate to the IIS Manager (inetmgr) and update your service account configuration for the Application Pool (CxAccessControl) in order to continue with the migration.
- Before the migration process begins, a message will appear, indicating that the user account for the CxAccessControl IIS Application Pool must be changed to the user that was used before, in order for the migration to succeed. Please notice: The migration tool continues with the migration without waiting for the 'OK' button to be pressed on the presented message. Hence, this change must be done in prior steps.
8. Click <OK> on the message, and then click <NEXT> to continue. The CxSAST URL Address window is displayed.

9. Click the URL Validation button to verify that the defined URL is reachable.
A "URL Validation Passed" message is displayed upon confirmed connection to the defined URL.
10. Once the URL has been validated, click <OK> on the message, and then click <NEXT> to continue. The Setup Summary window is displayed.

11. Check the setup summary according to your selection.
12. Click <INSTALL> to continue. Click <BACK> to return to the previous window, or <X>to exit. The migration process is started.
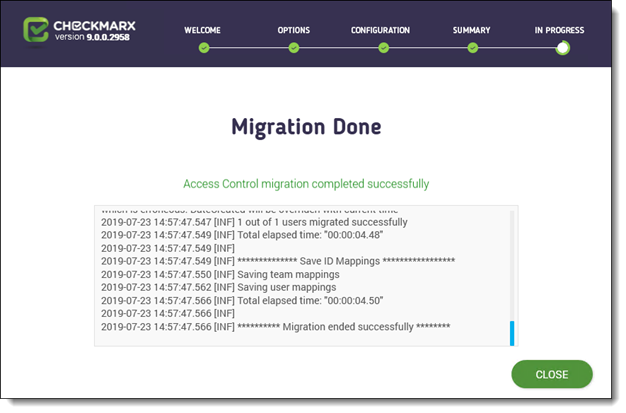
Once the migration process is complete, the Migration Complete window is displayed.

13. Click <CLOSE> to complete.
After running the Access Control Data Migration Tool Installer you should perform the recycling procedure for the AccessControl Application Pool from the IIS Manager.
Examples of Error Notifications and Potential Fixes
If any error is encountered during either the Access Control installation or data migration stage, an error notification will be displayed.
For a full list of error notifications and potential fixes, see Access Control Data Migration Tool Troubleshooting (v9.0.0 and v9.2.0).
Error found: In this example, the error is due to an invalid character ( \ ) in the team name: |
2018-11-07 07:59:29.999 [ERR] Failed to migrate team Team\C (Id: 88080c54-c92d-45a6-9fcb-ee60d9a7ceff). HTTP response status code: 400, content: {"Message":"Invalid character in team name."} |
|---|
Potential fix: The backslash (\) and colon (:) are not supported characters for a team name. In the SAST CxDB, change team name Team\C to Team-C for example, and rerun the data migration tool. |
Errors found: In this example, a problematic team GUID appears in the users-teams mapping table. |
2018-11-07 08:06:44.985 [Fatal] [ACMigrationTool.Infrastructure.SAST.SASTUsersRepository] Failed to read SAST users-teams connections from the database |
|---|
Potential fix:
|
Errors Found During Access Control Installation
If an error is detected during the Access Control installation, the installer does not proceed to the data migration stage. In this case, contact Checkmarx support.
After resolving the issues, rerun the Access Control Migration installer. If no further errors have been detected after the Access Control installation stage is completed, the Data Migration Tool runs automatically.
Errors Found During Data Migration

In the Data Migration phase, disabled users in v8.8.0 / v8.9.0 which belong to a non-existing authentication provider will not be migrated.
In case of an error found during the data migration stage, do the following:
- Rectify the problem / discrepancy in the SAST CxDB.
- In the installer, click the Rerun Data Migration button to perform the data migration again.
- Alternatively, you can exit and restart the installer, which will also confirm the Access Control installation was successful, before rerunning the migration again. Upon completion of the Access Control Migration installer without error notification, you receive a confirmation message.
Continue to the next phase, where you will perform a manual data verification procedure to ensure the integrity of the data migration.
Phase 2 – Manually Verifying the Data after Migration
Whether or not the prior phase returned any error messages during the Access Control setup or data migration, at this point – before upgrading the CxSAST version – you should manually verify the data that was migrated. Even without notification, errors in the migration of data may still exist for a variety of reasons – that may not even be connected to the data migration process – for example, data that was altered in CxSAST before the data migration, which could result in lost user data, or render the product inaccessible.
1. Refer to Access Control Data Migration Tool - Overview for information on what data to verify after the migration.
2. Log in to the Access Control interface, and then cross check for any problems or discrepancies in the data, for example by checking the data that has been migrated against the data in CxSAST.
3. Refer to the Access Control user documentation for information on working with the Access Control interface.

Phase 3 – Installing the New CxSAST Version (9.0.0 and up)
- After upgrading SAST 9.0, make sure to modify the link for the Sign-On URL for the SAML server from http{s}://{server}:{port}/CxRestAPI/auth/samlAcs to http{s}://{server}:{port}/CxRestAPI/auth/identity/samlAcs. Otherwise the access link to the SAML server is broken as the login page of the SAML server cannot be reached.
- When starting the CxSAST version upgrade installation (after successful completion of the Access Control Data Migration procedure), a message appears confirming that you have manually validated the migrated data (phase 2). Select Validate to confirm, otherwise exit the installation.

After clicking' Validate' button, a key named - 'isUserAcceptedAccessControlManualValidation', with value as true, will be added to [CxDB].[dbo].CxComponentConfiguration table. This confirms that Access control data migration was performed successfully & user can start upgrading their CxSAST version.
After the migrated data has been manually verified, you can now start upgrading CxSAST (v9.0.0 or later) by running the CxSAST installation file as an administrator.
Refer to the installation documentation for the CxSAST version.
.