Installing Management and Orchestration (v8.8.0)
First install CxSAST. Refer to Installing CxSAST for more information.
The CxSAST installation performs the following:
- Management and Orchestration installation and configuration
The following Management and Orchestration setup and synchronize performs the Management and Orchestration/CxSAST Database synchronization.
The CxSAST services will be stopped during initial synchronization. Initial synchronization may take some time depending on the size of the database and the amount of data being synchronized. The estimated synchronization time is based on the following:
- For every 1M CxSAST results/CxOSA libraries, the estimated synchronization time is approximately 5 minutes. This is also relevant also for incremental synchronization.
- The estimated synchronization time is also effected by the environment resource utilization - connection to the database, Server memory and CPU, etc.
For example, synchronization of a CxSAST environment with 5M CxSAST results and 2M CxOSA libraries will take approximately 35 minutes.
To setup and synchronize Management and Orchestration:
Once the ‘Installation Completed Successfully’ wizard is displayed, indicating that the CxSAST installation has finished, verify that the ‘Execute CxARM Initial Synchronization’ checkbox is selected.

Click Close. The Risk Management Installation setup preparation wizard is displayed.

Once the Risk Management Installation preparation wizard is complete, the Risk Management Welcome screen is displayed.

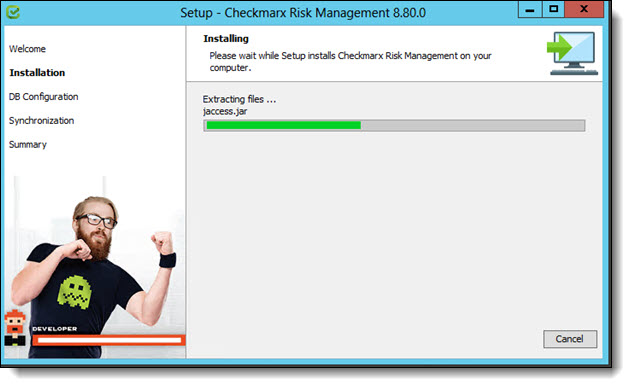
Click Next to continue, or Cancel to exit the setup. Click Next to continue. The Management and Orchestration setup is started.
Once the Management and Orchestration/CxSAST Database Configuration screen is displayed, complete the database configuration details.
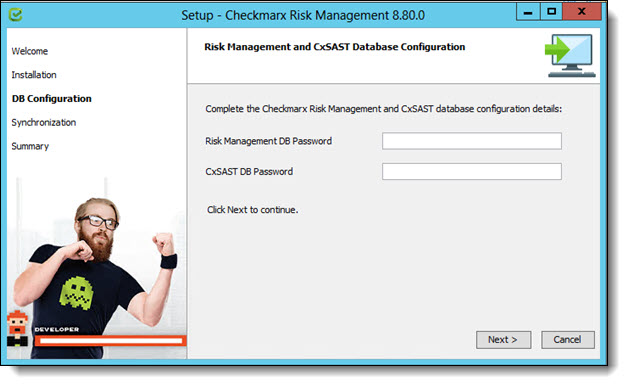
Enter the following database configuration details:
- Risk Management DB Password – Password used to access the Management and Orchestration database
- CxSAST DB Password – Password used to access the CxSAST database
The Username and Password should be the same as was used when the Risk Management/CxSAST database in SQL Server was installed and configured.
Once complete, click Next to continue. The database connection verification starts. First the Checkmarx Risk Management database and then the CxSAST database.

Once the database connection verification is complete, the database setup starts.

Once the Database Synchronization screen is displayed, click Next to continue.

Unchecking the checkbox, hides the following Log File Content screen.
Once the Log File Content screen is displayed, click Next to continue.
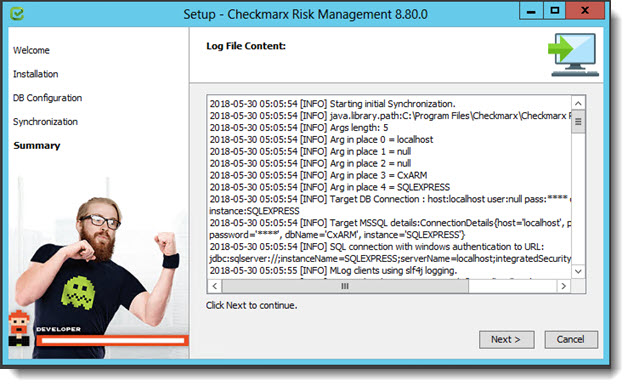
Once complete, the Management and Orchestration Setup Completed Successfully screen is displayed.

If the installation failed, the reason can usually be found in the installation log file, see Installation Logs.
Click Close to complete the installation.
Installation Logs
If the installation failed for any reason, the cause can be found in the following log files:
Management and Orchestration logs:
C:\Program Files\Checkmarx\Logs\CxArm
Tomcat Logs:
C:\Program Files\Checkmarx\Logs\CxARM\Tomcat\....
- cxarm<date>.log
- eventsReport<date>.log
ETL logs (initial sync + incremental sync):
C:\Program Files\Checkmarx\Logs\CxARM\ETL\....
- SyncETL.log
- IncrementalSyncETL.log
- i4j_log_Risk Management_<some number>.log (successful installation)
For unsuccessful Installation: C:\Program Files\Checkmarx\Logs\CxARM\ETL\.install4j\....
- Installation.log
Configuring HTTPS in Apache Tomcat
Management and Orchestration should be defined according to the CxSAST definition. This means that If CxSAST is defined for HTTPS then Management and Orchestration should also be defined in the same way.
HTTP is not recommended, but if CxSAST is defined this way then Management and Orchestration should be defined the same way.
The following instructions for running the Management and Orchestration API over HTTPS offers a general procedure for configuring HTTPS in Apache Tomcat. If you require more specific instructions, please refer to the Apache Tomcat documentation.
To configure HTTPS in Apache Tomcat:
Open the server.xml configuration file, located in <Risk Management directory>\Tomcat\apache-tomcat-8.5.24\conf\ (<Risk Management directory> represents the directory where Apache Tomcat is installed).
Locate the SSL HTTP/1.1 Connector entry.
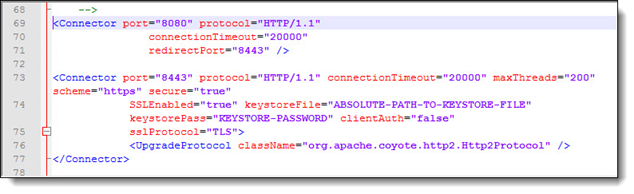
Verify the SSL HTTP/1.1 Connector entry is enabled.
Change the values in keystoreFile="ABSOLUTE-PATH-TO-KEYSTORE-FILE" and keystorePass="KEYSTORE-PASSWORD" according to the values provided during the generation of the self-signed certificate (see Generating a Self-signed Certificate).
Save the file and restart Apache Tomcat.
Generating a Self-signed Certificate
Self-signed certificate generation provides the relevant values for configuring Management and Orchestration API to run over HTTPS (see Configuring HTTPS in Apache Tomcat).
Open the command line in the Java JDK bin directory, in most instances located in C:\Program Files\Java\jdk1.8.0_151\bin.
Run the following keytool command (changing <Machine-name> with the proper machine name or IP):
keytool -genkey -alias <Machine-name> -ext SAN=ip: <Machine-name> -keyalg RSA -keystore "C:\keystoreFiles\Cert.KeyStore" -validity 10950
After running the keytool command, you will be prompted for the following values:
- Password Type: <KEYSTORE-PASSWORD>
- First and Last Name: <MACHINE-NAME>
- Keystore Password: <KEYSTORE-PASSWORD>
- Re-enter keystore Password: <KEYSTORE-PASSWORD>
- What is your first and last name?
[Unknown]: <MACHINE-NAME> - What is the name of your organizational unit?
[Unknown]: Cx - What is the name of your organization?
[Unknown]: Cx - What is the name of your City or Locality?
[Unknown]: Cx - What is the name of your State or Province?
[Unknown]: Cx - What is the two-letter country code for this unit?
[Unknown]: IL - Is CN=<MACHINE-NAME>, OU=Cx, O=Cx, L=Cx, ST=Cx, C=IL correct?
[no]: yes - Enter key password for <URL>
(RETURN if same as keystore password): <press return key>
Verify that the Cert.KeyStore file was created successfully.